Drills On How to Use the MARKER/TRAINER During Play?
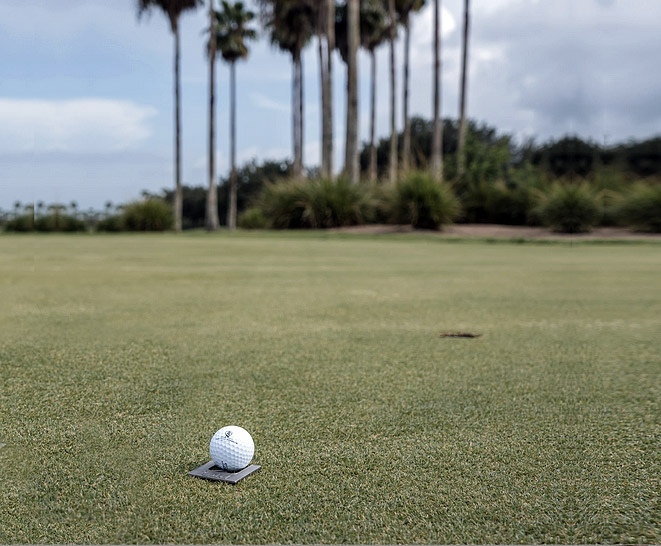
Playing Drill 1: Precision Marking the Ball Prior To Lifting (Marker/Trainer)
Playing Drill 2: Accurately Replace the Ball After Being Requested to Move by Competitor (Marker/Trainer) – click here
Playing Drill 3: Improve Putting Accuracy (Marker/Trainer)
Drills On How to Use the MARKER/TRAINER To Practice
Practicing Drill 1: Golf Swing with Any Club (Marker/Trainer)
Practicing Drill 2: Hitting from a Greenside Bunker (Trainer only)
Practicing Drill 3: Putting Alignment by Squaring the Putter Face (Trainer Only)
Practicing Drill 5: Practice Putting Aiming and Distance Control (Marker/Trainer)
Practicing Drill 6: Practice Putting by Create Imaginary Holes (Marker/Trainer)
Objective:
To ensure you never accidentally mismark the ball, avoiding disputes and/or penalty strokes.

Instructions
Step 1: Slide the Marker/Trainer under the golf ball until the ball touches the center point and the legs form a cradle around the ball.
Step 2: Lift the ball for cleaning (or for other purposes).
Step 3: Replace the ball inside the cradle with the ball touching the center point.
Step 4: Using the side legs, pick up the Marker/Trainer or complete Playing Drill 3.
Objective:
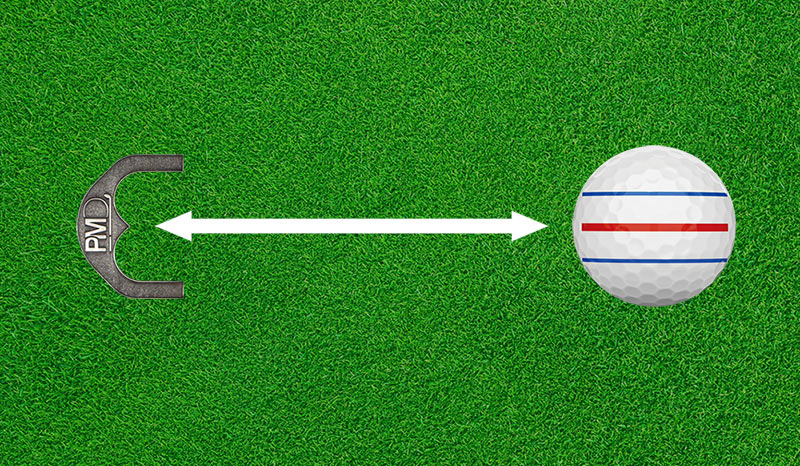
To accurately reposition the ball when asked to move it by an opponent. When properly placed it shows (reminds) you the specific direction where the ball was, avoiding disputes and/or penalty strokes.
Instructions
Step 1: Using your putter head for measurement, move your ball in the direction requested by your competitor. Replace your ball with the Marker/Trainer.
Step 2: Rotate the Marker/Trainer so that the legs point back in the direction the ball was moved.
Step 3: After competitor has completed their stroke, replace the ball back on the green the same distance from the Marker/Trainer as before, and in the direction as indicated by the legs of the Marker/Trainer.
Step 4: Pick up the Marker/Trainer or complete Playing Drill 3.
Objective:
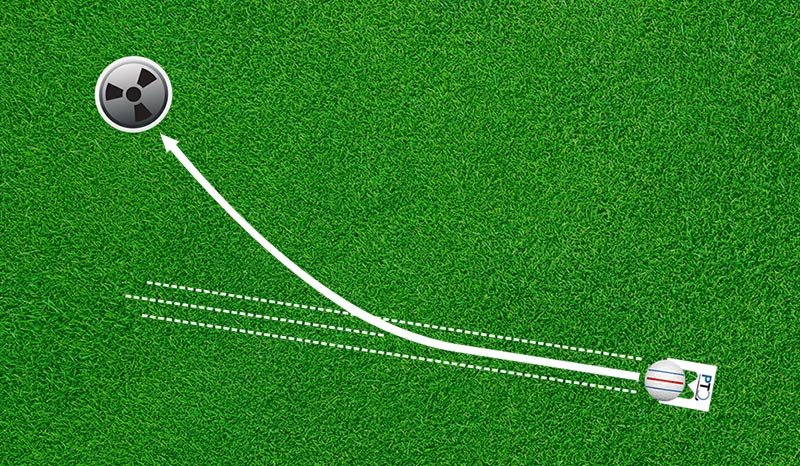
To allow you to get better understanding of your putting path by gaining a wider view (compared to a single line) of the putting path utilizing 3 reference points method.
Instructions
Step 1: Determine your probable putting path by observing the ball from several different perspectives noting slopes in the putting green.
Step 2: Slide the Marker/Trainer under the ball with the legs pointed at the probable putting path until the ball touches the center point.
Step 3: Pick up the ball.
Step 4: Rotate the Marker/Trainer, in place, until the legs are pointing at the outside edges of the probable putting path and the center point is pointing down the putting path.
Step 5: Replace the ball with the ball alignment line parallel to the Marker/Trainer legs. The ball alignment line is now pointing down the correct putting path.
Step 6: Using the side legs, pick up the Marker/Trainer and putt.
Objective:
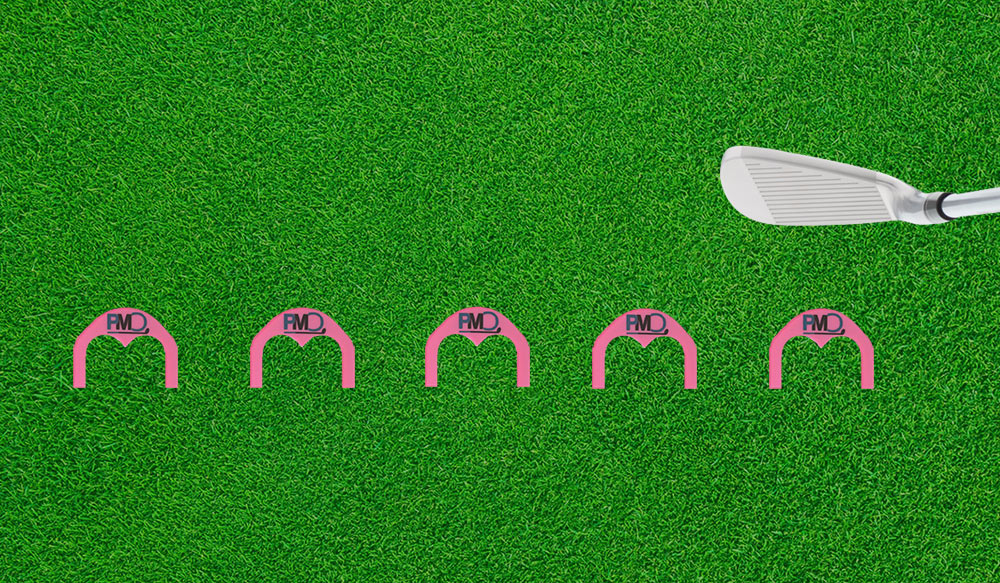
To improve and maintain (stay sharp) your golf swing year-round on grass of similar height to golf course grass, or on an artificial grass mat in/outdoors at home/work.
Instructions
Step1: Place the Marker, with rounded top facing the rear.
Step2: Visualize the rounded top as the back of an imaginary golf ball.
Step 3: Take your normal golf swing.
Note: If the imaginary ball is hit “fat” or “thin”, it will not go anywhere. If the imaginary ball is hit correctly, it will fly 3-4 feet.
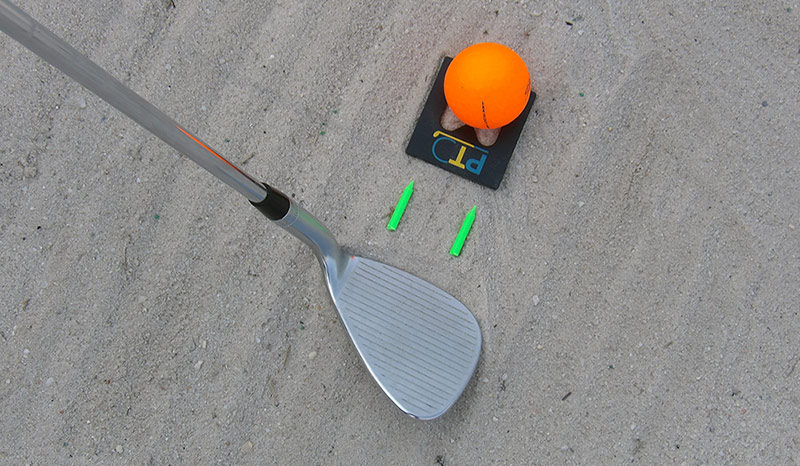
Objective:
Hitting out of a greenside bunker by striking sand 1-3″ behind the ball.
Instructions
Step 1: Place the Trainer in the sand of a practice greenside bunker with legs pointing down the swing path.
Step 2: Place the ball inside the Trainer with center point touching the ball.
Step 3: Open desired club head (recommend pitching, sand, or lob wedge) until the face of the club is facing the sky (upwards).
Step 4: Take your normal grip and keep club shaft at 90 degrees or slightly right of center.
Step 5: Assume a slightly wide stance with the ball slightly forward of center.
Step 6: Dig in feet slightly, flex knees and put weight of bottom half (legs/hips) forward.
Step 7: Visualize the top flat edge of the Trainer and aim slightly behind it.
Step 8: Swing hard with complete follow through. The ball should be propelled by sand onto the practice green.
NOTE: Beginning golfers tend to look at the back of the golf ball, resulting in “sculled” sand shots. Hitting behind the Trainer will teach correct striking sand 1-3″ behind the ball.
Objective:
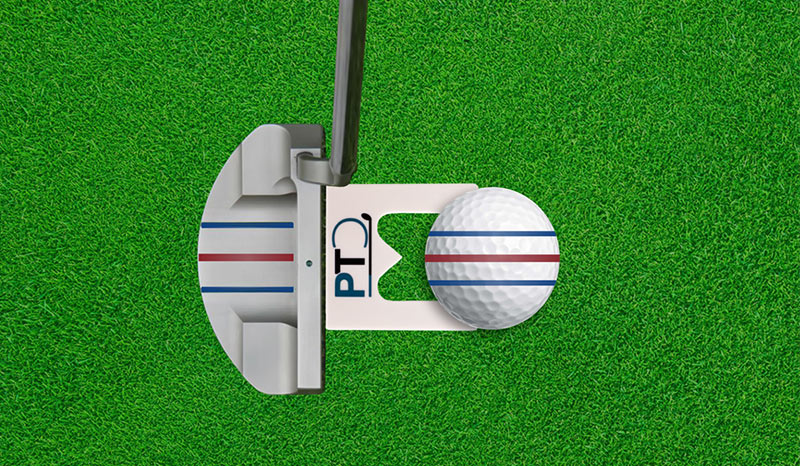
To improve putting accuracy by adjusting your putting grip to ensure that putter face is square to the ball.
Instructions
Step 1: Slide the Trainer under the golf ball, on a practice putting green, until the ball touches the center point, and the legs form a cradle around the ball.
Step 2: Assume your normal grip on your putter and slide it up until it touches the top flat edge of the Trainer. Make sure your wrist does not turn.
Step 3: If the “toe” or “heel” of the putter face shows an opening then loosen your grip.
Step 4: Gently slide the putter face up to the flat top of the Trainer until the face of the putter is completely flush with the top of the Trainer.
Step 5: Assume your normal putting grip. Take note of any changes in hand location on the grip. The putter face is now square to the ball.
NOTE: When the putter face is not square to the ball you will “push” the putt left or right making putting inaccurate.
Objective:
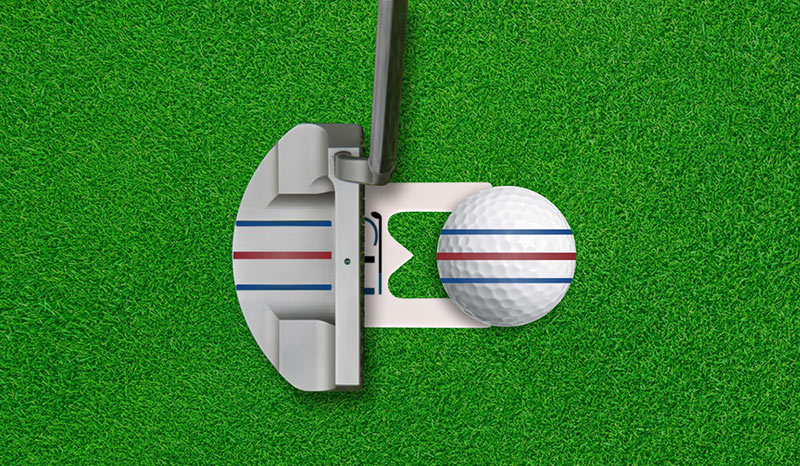
To avoid missed putts caused by “grass lag” i.e. when the putter drags the putting surface on either your back or forward swing.
Instructions
Step 1: Place the Trainer on the practice putting green.
Step 2: Place the ball inside the Trainer legs with center point touching the ball.
Step 3: Place the putter face on top of the Trainer directly behind the ball.
Step 4: Maintain your normal putting grip.
Step 5: Make a putting stroke with putter on top of the Trainer.
NOTE: Many golfers experience “grass lag” when the putter drags the putting surface on either their back or forward swing. By learning to raise the putter 1/8″ off the putting surface, golfers can avoid missed putts caused by “grass lag”.
Objective:
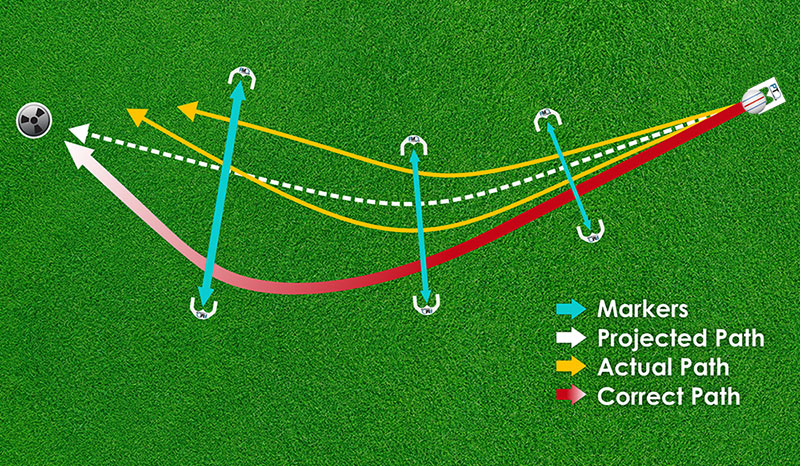
To improve green reading skills and putting accuracy on more challenging medium to long putts of 12 feet or more.
Instructions
Step 1: Choose a challenging putting green with a slope(s) and hump(s).
Step 2: Place the ball at least 12 feet from the hole in a selected spot.
Step 3: Determine your projected/probable putting path by observing the ball from several different perspectives noting green friction/slopes/humps in the putting green.
Step 4: Using 6 or more (preferably) Markers, place Markers 1 feet to the left and right of your projected putting path with legs facing the direction of the path at that position on the projected path.
Step 5: Slide the Marker/Trainer under the ball with the legs pointed at the probable putting path until the ball touches the center point.
Step 6: Pick up the ball.
Step 7: Rotate the Marker/Trainer, in place, until the legs are pointing at the outside edges of the probable putting path and the center point is pointing down the putting path.
Step 8: Replace the ball with the ball alignment line parallel to the Marker/Trainer legs. The ball alignment line is now pointing down the projected putting path.
Step 9: Using the side legs, pick up the Marker/Trainer.
Step 10: Make the putt and carefully observe actual putting path.
Step 11: Place another golf ball in the same position the previous ball was before putting.
Step 12: Observe where the ball stopped and only remove ball if it obstructs the next putt.
Step 13: Revisit the projected putting path and adjust Marker positions based on:
- Actual observed putting path.
- Using the 3-reference point method to obtain a wider view of the probable putting path at the Markers along the path.
Step 14: Repeat steps 5 to 13 until you discover the correct putting path and make the putt. Practice the putt until you are satisfied that you have mastered aiming and distance control for this putt.
Objective:
To improve putting skills by placing markers on golf course greens or at home to represent holes with different putting conditions.
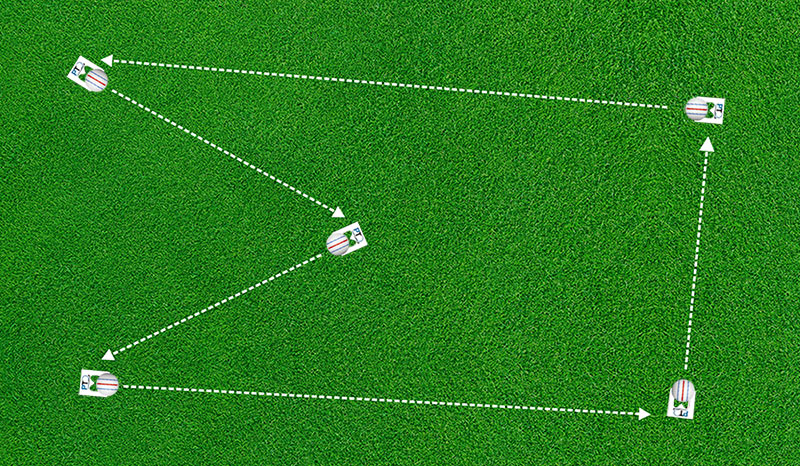
Instructions
Step 1: Choose and observe the putting conditions of a practice putting green.
Step 2: Set Markers/Trainers in a circular fashion to represent holes that simulate different putting conditions. Note: Plan each “hole” to be the starting point of the next putt.
Step 3: Place golf ball at a Marker/Trainer with the imaginary hole the next Marker/Trainer.
Step 4: Determine your probable putting path by observing the ball from several different perspectives noting slopes in the putting green.
Step 5: Slide the Marker/Trainer under the ball with the legs pointed at the probable putting path until the ball touches the center point.
Step 6: Pick up the ball.
Step 7: Rotate the Marker/Trainer, in place, until the legs are pointing at the outside edges of the probable putting path and the center point is pointing down the putting path.
Step 8: Replace the ball with the ball alignment line parallel to the Marker/Trainer legs. The ball alignment line is now pointing down the correct putting path.
Step 9: Using the side legs, pick up the Marker/Trainer.
Step 10: Make the putt and carefully observe actual putting path. Do not remove ball).
Step 11: Practice same putt 4 more times; pick up the balls; and move to the next Marker/Trainer.
Step 12: Repeat steps 3 to 11 until you are back at the starting point.
Step 13: Repeat steps 3 to 11 but in the opposite direction. If you started clockwise then go anti-clockwise or vice versa.
Note: The goal is to that the ball should stop around 12 inches past the Marker/Train to ensure that the putt will be successful.
